
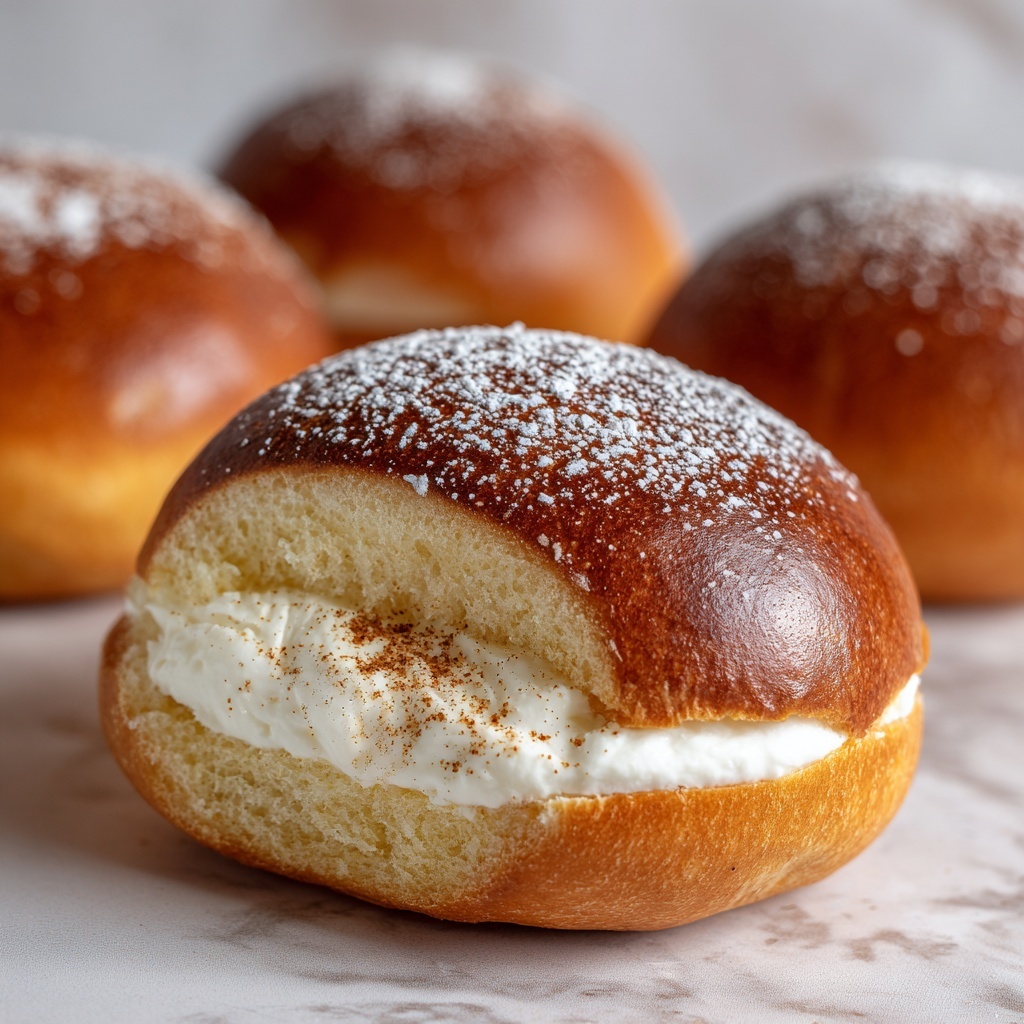
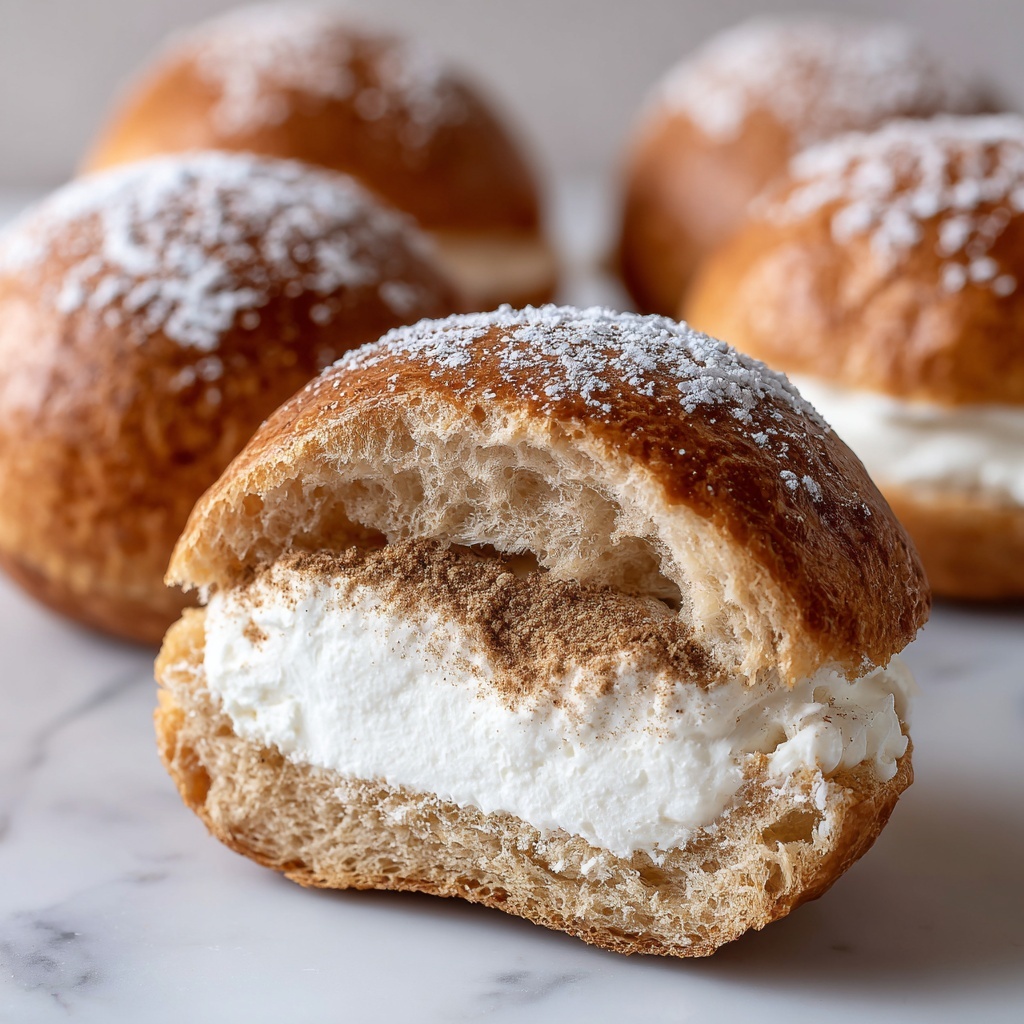
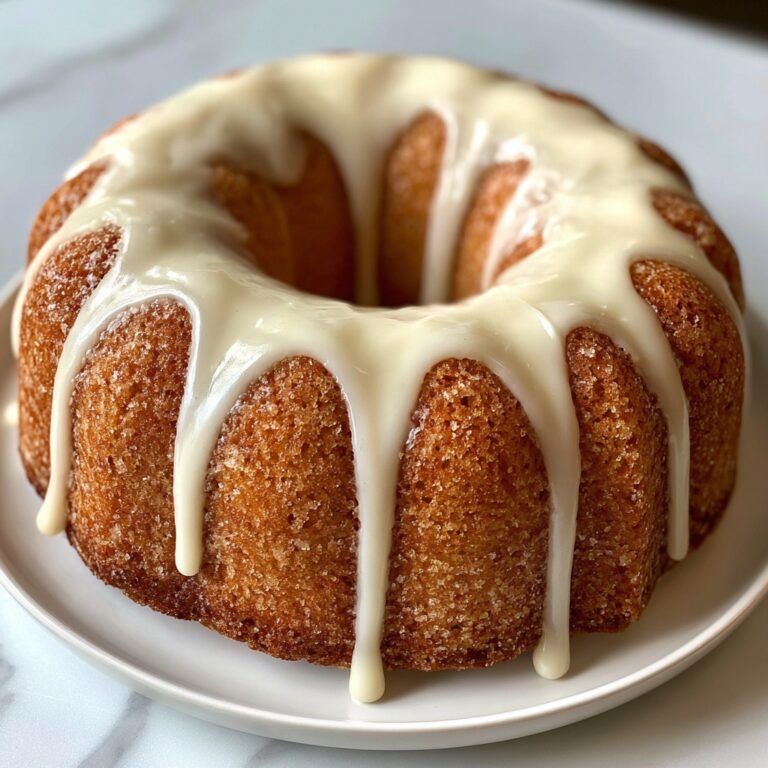
If you have ever wished for soft, buttery, and irresistibly fluffy rolls that transport you straight to a tropical paradise, this Quick King’s Hawaiian Cream Rolls Recipe is your golden ticket. Combining a tender crumb with just the right hint of sweetness, these rolls are perfect for any occasion, from a casual family dinner to a festive holiday feast. What I love most is how approachable this recipe is—it feels like a special treat without requiring hours of complicated prep. Once you master these rolls, your kitchen will be filled with that amazing aroma that just screams comfort and happiness.
Ingredients You’ll Need
Simple ingredients form the heart and soul of this recipe, each playing a key role in achieving the perfect texture, flavor, and aroma. From creamy milk to fragrant vanilla, every component adds something special to these delightful rolls.
- Whole milk: Provides richness and tenderness to the dough for a soft crumb.
- Unsalted butter: Adds buttery flavor and helps keep the rolls moist.
- Granulated sugar: Sweetens the dough subtly and feeds the yeast to help it rise.
- Active dry yeast: The magical ingredient that makes the dough rise and gives the rolls their airy texture.
- Warm water: Activates the yeast to get the rising started quickly.
- All-purpose flour: The main structure builder for the dough, creating that perfect balance of softness and sturdiness.
- Salt: Enhances all the flavors and balances the sweetness beautifully.
- Large eggs: Enrich the dough with moisture and add subtle flavor complexity.
- Vanilla extract: Imparts a warm, fragrant note that makes these rolls truly special.
How to Make Quick King’s Hawaiian Cream Rolls Recipe
Step 1: Prepare the Yeast
Begin by waking up the yeast with warm water and a bit of sugar. This step ensures your yeast is active and ready to make those rolls fluffy and light. Watching the mixture turn foamy is like seeing the promise of soft rolls in action.
Step 2: Heat the Milk and Butter
Gently heating the milk and butter together melts the butter perfectly and warms the milk to a cozy temperature. This mixture adds richness while keeping the dough soft and supple, setting the stage for wonderfully tender rolls.
Step 3: Combine Wet Ingredients
Next, whisk your eggs and vanilla together to bring a lovely depth of flavor and moisture. Slowly mixing in the warm milk and butter ensures the eggs don’t cook and everything blends into a smooth, creamy foundation.
Step 4: Add Yeast Mixture
Once bubbly and lively, the yeast mixture joins the party. This boosts the dough’s rising power, promising that light and airy texture that makes these rolls irresistible.
Step 5: Add Dry Ingredients
Gradually incorporating flour and salt helps you find the perfect balance between sticky and workable dough. Taking your time here prevents over-flouring and keeps your rolls beautifully soft.
Step 6: Knead the Dough
Working the dough until smooth and elastic develops the gluten structure needed to trap those lovely bubbles formed by the yeast. Whether by hand or with a mixer, kneading is where the magic of texture really begins.
Step 7: Let the Dough Rise
Place the dough in a greased bowl and let it relax in a warm spot until doubled in size. This slow rise unlocks flavor and lightness, creating that classic airy bite.
Step 8: Shape the Rolls
After the rise, punch down the dough to gently release air, then portion into 12 equal balls. Arranging them snugly together encourages soft sides that practically melt in your mouth.
Step 9: Second Rise
Let the shaped rolls rise again for about 30 minutes so they puff up beautifully, ensuring your finished rolls have that perfect fluffy height.
Step 10: Bake the Rolls
Bake at 350°F (175°C) until they’re golden brown and sound hollow when tapped. The result is a perfectly baked exterior with a tender, creamy interior that’s pure bliss.
Step 11: Optional Butter Brush
Giving your fresh rolls a quick brush of melted butter adds extra flavor and a soft, inviting shine on top. It’s a small step that makes a big difference in mouthfeel.
Step 12: Cool and Serve
Allow your rolls to cool just enough to handle, then serve them warm to enjoy their soft, sweet, and delightfully fluffy textured goodness.
How to Serve Quick King’s Hawaiian Cream Rolls Recipe
Garnishes
These rolls are delicious on their own, but a light dusting of powdered sugar or a drizzle of honey takes their flavor up a notch. For a savory twist, try a pat of cinnamon butter or your favorite jam spread for a delightful contrast.
Side Dishes
Pairing these soft rolls with tangy coleslaw and slow-cooked pulled pork makes for a heavenly meal. They also complement hearty stews, grilled chicken, or even a simple breakfast of scrambled eggs and bacon beautifully.
Creative Ways to Present
For a fun twist, slice and use them for mini sandwich sliders stuffed with ham and cheese or turkey and cranberry sauce. They also make perfect bases for sliders at parties or as a whimsical addition to your brunch table.
Make Ahead and Storage
Storing Leftovers
Store any leftover rolls in an airtight container at room temperature for up to 2 days. Keeping them sealed helps maintain moisture and softness, so every bite stays as delightful as fresh.
Freezing
Wrap cooled rolls tightly in plastic wrap and then foil, or pop them in a freezer-safe bag to freeze for up to 3 months. When you’re ready, thaw them overnight in the fridge for convenience without sacrificing texture.
Reheating
Reheat rolls gently in the oven at 300°F for about 10 minutes or microwave them wrapped in a damp paper towel for 20-30 seconds. Either way restores their soft, warm charm perfectly, almost like freshly baked.
FAQs
Can I use bread flour instead of all-purpose flour?
Absolutely! Bread flour has a higher protein content, which can give your rolls a chewier texture and a slight lift in height. Just keep an eye on the dough—it might need a touch more liquid or flour to feel just right.
How important is the milk temperature?
It’s crucial to keep the milk warm but not hot, around 110°F (43°C). Too hot, and you risk killing the yeast or cooking the eggs; too cool, and the yeast won’t activate properly, leading to dense rolls.
Can I make these rolls gluten-free?
Transforming this recipe gluten-free would require special flour blends and possibly additional binders like xanthan gum. While not impossible, it might affect the texture considerably, so it’s best to experiment with a dedicated gluten-free recipe for best results.
How can I make the rolls more flavorful?
Adding a tablespoon of pineapple juice along with the milk or increasing the vanilla slightly can enhance the tropical sweetness characteristic of King’s Hawaiian rolls. Some folks also like adding a touch of honey for a natural sweetness boost.
Why do my rolls sometimes turn out dense?
Dense rolls usually mean the dough didn’t rise enough, the yeast was inactive, or the flour measurement was off. Making sure your yeast is fresh and the dough gets enough time in a warm place to rise will prevent this problem.
Final Thoughts
Honestly, this Quick King’s Hawaiian Cream Rolls Recipe is one of those treasures that turns any meal into a memorable occasion. They’re soft, a little sweet, and so comforting, you’ll be tempted to make them again and again. I encourage you to grab these ingredients and create your own batch of magic—your family and friends will thank you!
Print
Quick King’s Hawaiian Cream Rolls Recipe
- Prep Time: 15 minutes
- Cook Time: 25 minutes
- Total Time: 11 hours 35 minutes (including rising time)
- Yield: 12 rolls
- Category: Bread
- Method: Baking
- Cuisine: American Hawaiian-inspired
Description
These Quick King’s Hawaiian Cream Rolls are a soft, sweet, and fluffy bread inspired by the classic King’s Hawaiian rolls. Made with a tender dough enriched with milk, butter, eggs, and vanilla, they come together quickly with two rises and bake to a golden perfection. Perfect for breakfast, snacks, or to complement any meal, these rolls deliver a comforting homemade touch with a buttery finish.
Ingredients
Wet Ingredients
- 1 cup whole milk
- 1/2 cup (1 stick) unsalted butter
- 2 large eggs
- 1 teaspoon vanilla extract
- 1/4 cup warm water (110°F/43°C)
Dry Ingredients
- 1/2 cup granulated sugar
- 1 tablespoon active dry yeast
- 3 1/2 cups all-purpose flour
- 1/2 teaspoon salt
Instructions
- Prepare the yeast: In a small bowl, combine the warm water and sugar. Stir until the sugar is dissolved. Sprinkle the yeast over the water and let it sit for about 5-10 minutes, until it becomes foamy and active.
- Heat the milk and butter: In a small saucepan, heat the milk and butter together over medium heat until the butter is completely melted and the milk is warm but not hot (about 110°F/43°C). Remove from heat.
- Combine wet ingredients: In a large mixing bowl, whisk together the eggs and vanilla extract. Slowly add the warm milk and butter mixture to the eggs, stirring gently to combine.
- Add yeast mixture: Once the yeast is activated and foamy, add it to the wet ingredients in the bowl and mix well.
- Add the dry ingredients: Gradually add the flour and salt, 1/2 cup at a time, stirring until the dough comes together. It should be soft but slightly sticky. Add more flour if necessary to achieve the right consistency.
- Knead the dough: Turn the dough out onto a lightly floured surface and knead for about 5-7 minutes, until smooth and elastic. Alternatively, knead using a stand mixer with a dough hook attachment.
- Let the dough rise: Place the dough in a lightly greased bowl, cover with a clean towel or plastic wrap, and let it rise in a warm place for 1 to 1.5 hours, or until it doubles in size.
- Shape the rolls: Punch down the risen dough and divide it into 12 equal portions. Roll each portion into a ball and arrange them closely together in a greased 9×13-inch baking dish.
- Second rise: Cover the pan with a towel or plastic wrap and let the rolls rise for an additional 30 minutes until puffed up.
- Bake: Preheat your oven to 350°F (175°C). Bake the rolls for 20-25 minutes, until the tops are golden brown and the rolls sound hollow when tapped.
- Optional – Brush with butter: For extra flavor and a soft finish, brush the hot rolls with melted butter immediately after baking.
- Cool and serve: Allow the rolls to cool slightly in the pan for a few minutes, then serve warm. Enjoy their soft, sweet, and fluffy texture!
Notes
- For best results, ensure the milk and butter mixture is warm but not hot to avoid killing the yeast.
- You can prepare the dough in a stand mixer to save time and effort on kneading.
- These rolls freeze well; thaw and reheat them gently before serving.
- Adding a light brush of melted butter after baking enhances softness and flavor but is optional.


