
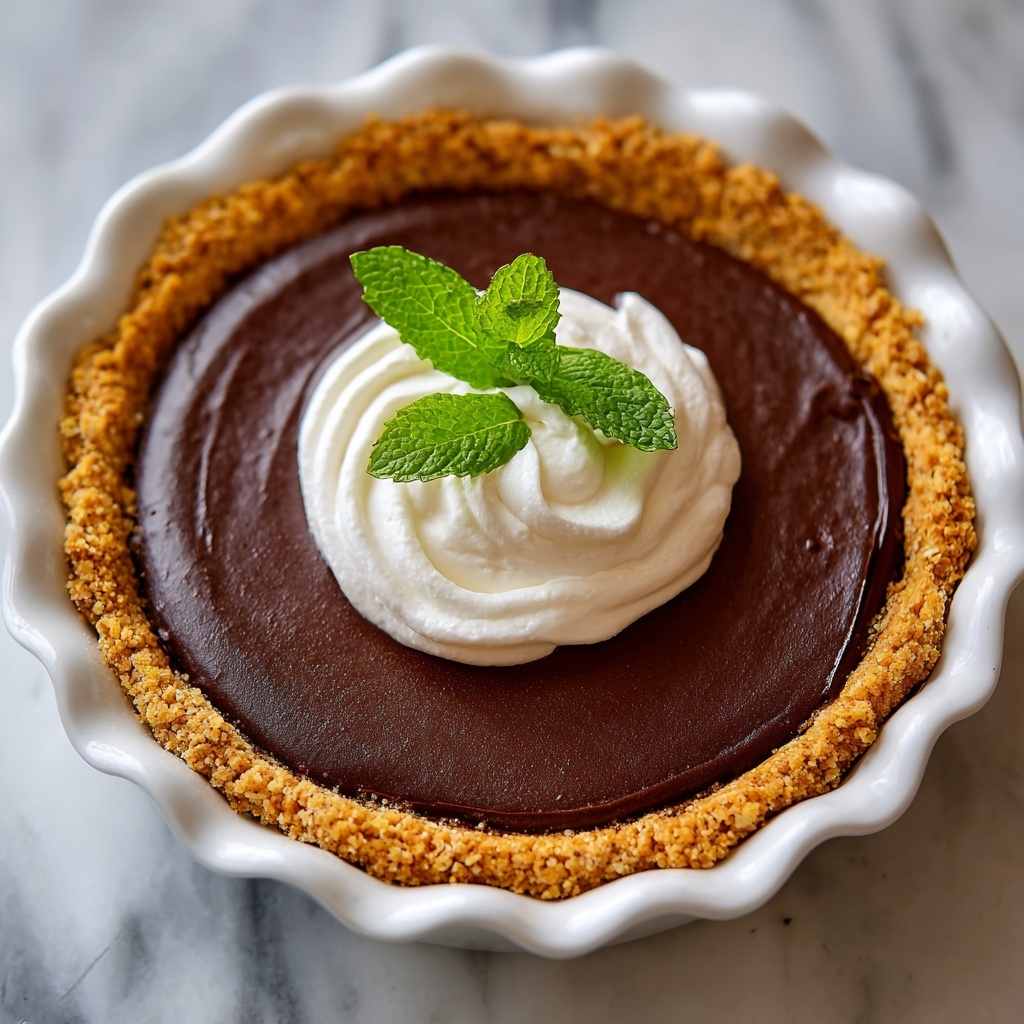
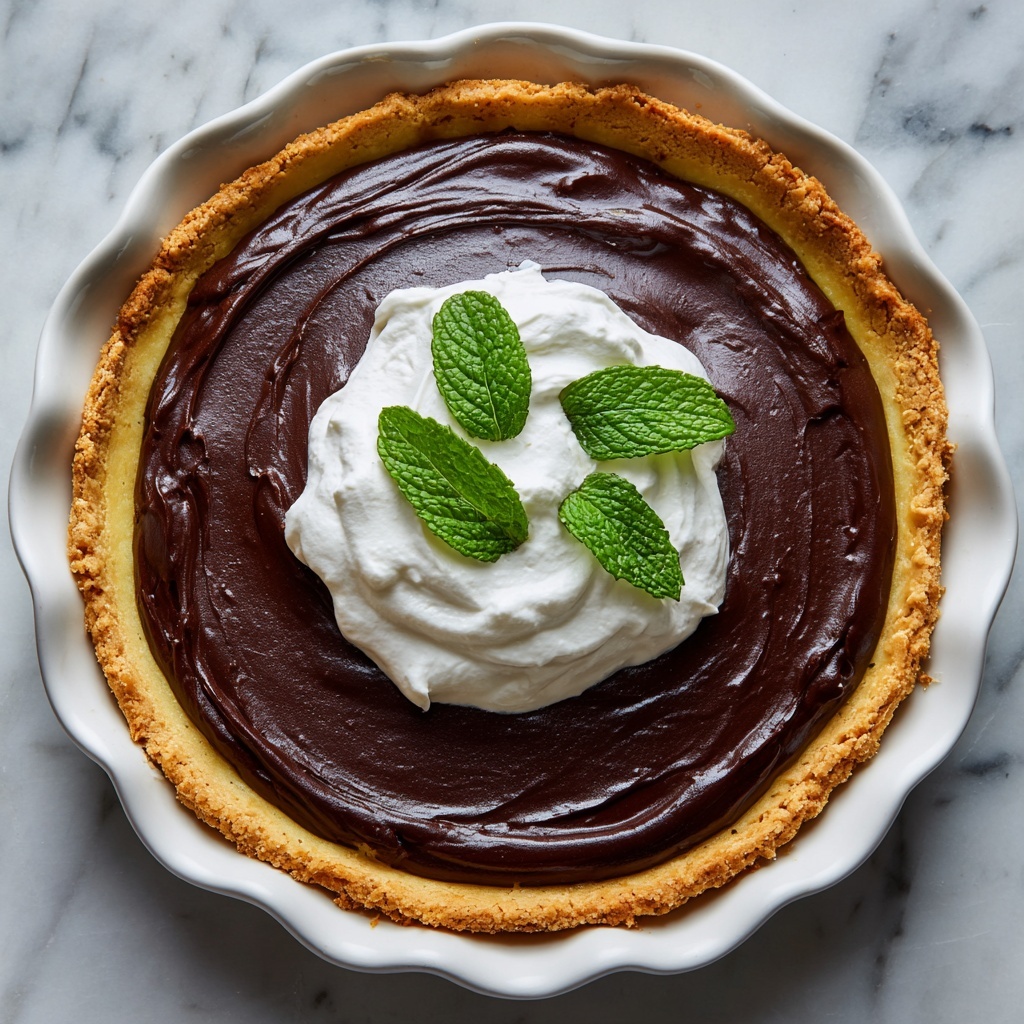
If you’re craving a dessert that feels like a warm hug from the past, this Old-Fashioned Chocolate Cream Pie Recipe is exactly what you need. It’s a timeless classic that brings together a silky, rich chocolate custard nestled in a flaky pre-baked crust, topped with the lightest, cloud-like meringue. Each spoonful offers the perfect balance of creamy sweetness and chocolate goodness, making it an absolute favorite for sharing with anyone who loves a nostalgic treat. Let’s dive into why this pie stands out and how you can bring it to your table with simple, wholesome ingredients.
Ingredients You’ll Need
Every ingredient in this Old-Fashioned Chocolate Cream Pie Recipe plays a key role in creating its luscious texture and unforgettable flavor. You’ll find these staples are easy to gather but powerful in taste, transforming everyday pantry items into a legendary dessert.
- Pre-baked pie crust: Provides the perfect crisp base that holds the creamy filling without getting soggy.
- Butter (1/4 cup): Adds richness and a smooth mouthfeel to the custard.
- Granulated sugar (1 cup): Sweetens the pie filling, balancing the cocoa’s natural bitterness perfectly.
- All-purpose flour (1/4 cup): Thickens the custard to the perfect consistency.
- Cocoa powder (1/2 cup): Offers the deep chocolate flavor that makes this pie so irresistible.
- Milk (2 cups): Creates a creamy, velvety texture and lightens the richness of the butter and cocoa.
- Egg yolks (3): Give the filling its classic silky custard texture and help set it firmly.
- Vanilla extract (1 teaspoon): Enhances all the other flavors, adding a warm, aromatic touch.
- Egg whites (3): Whisked into a fluffy meringue topping that crowns the pie beautifully.
- Cream of tartar (1/4 teaspoon): Stabilizes the meringue so it whips up light and stays fluffy.
- Sugar (1/2 cup): Sweetens the meringue topping and helps it hold firm peaks.
How to Make Old-Fashioned Chocolate Cream Pie Recipe
Step 1: Prepare the Chocolate Custard Filling
Begin by melting the butter in a medium saucepan over medium heat. Once melted, whisk in the sugar, flour, and cocoa powder until well combined, forming a smooth paste. Gradually pour in the milk, stirring continuously to prevent lumps. Keep cooking and stirring until the mixture thickens and reaches a custard-like consistency, about 8 to 10 minutes. Next, lightly beat the egg yolks in a separate bowl. Temper the egg yolks by slowly adding a few spoonfuls of the hot chocolate mixture into them while whisking constantly to avoid curdling. Then, pour the tempered egg yolks back into the saucepan, stirring well. Cook for another 2 minutes until thickened, then remove from heat and stir in the vanilla extract for that warm, homey flavor.
Step 2: Pour the Filling into the Pie Crust
Carefully pour the hot chocolate custard filling into your pre-baked pie crust. Make sure the crust is completely cool before adding the filling to prevent it from getting soggy. Smooth the surface with a spatula for an even finish, then set the pie aside while you prepare the meringue topping.
Step 3: Whip the Meringue Topping
In a clean, dry mixing bowl, beat the egg whites with cream of tartar on medium speed until soft peaks form. Gradually add the 1/2 cup of sugar, one tablespoon at a time, while continuing to beat until stiff, glossy peaks appear. This fluffy meringue will add a delicate lightness and a slightly crispy finish when baked.
Step 4: Spread the Meringue and Bake
Immediately spread the meringue evenly over the warm chocolate filling, making sure to seal the edges to the crust. This prevents the meringue from shrinking away while baking. Place the pie in a preheated oven at 350°F (175°C) and bake for 10 to 15 minutes, or until the meringue tops are golden brown and delightfully toasted. Allow the pie to cool completely before serving; this step is essential for the filling to set properly and the flavors to meld beautifully.
How to Serve Old-Fashioned Chocolate Cream Pie Recipe
Garnishes
Once your masterpiece is ready, think about garnishing it with a few extras to elevate every slice. A light dusting of cocoa powder or finely grated chocolate over the meringue adds a touch of elegance. You can also top it with a few fresh raspberries or a sprinkle of toasted chopped nuts for added texture and a burst of flavor. Whipped cream on the side never hurts either if you want to intensify the experience.
Side Dishes
This Old-Fashioned Chocolate Cream Pie Recipe holds its own, but if you’d like to serve it along with something else, consider a simple cup of freshly brewed coffee or a scoop of vanilla ice cream. The bitterness of coffee complements the rich chocolate, while vanilla ice cream introduces a creamy contrast that melts beautifully against the warm pie.
Creative Ways to Present
Rather than serving the whole pie, slice it into individual servings and plate each with a drizzle of raspberry coulis for a pop of color and acidity. Alternatively, you could cut the pie into small squares and serve as part of a dessert platter alongside assorted cookies and fruits. For holiday gatherings, adding festive chocolate curls or edible gold leaf to the meringue makes the pie feel extra special.
Make Ahead and Storage
Storing Leftovers
Store any leftover pie covered tightly with plastic wrap or in an airtight container in the refrigerator. It keeps well for up to 3 days, with the custard maintaining its silky texture and the meringue staying relatively soft but still delicious.
Freezing
While this pie is best enjoyed fresh, you can freeze the custard filling separately for up to one month. The pre-baked crust and meringue do not freeze well, so it’s best to prepare those just before serving. When you’re ready, thaw the custard overnight in the refrigerator before assembling the pie.
Reheating
Reheating this pie is a bit tricky due to the delicate meringue topping, which can lose its texture. If desired, warm a single slice gently in the microwave for about 10-15 seconds just to take the chill off. Avoid heating the whole pie to preserve the crispy meringue and custard consistency.
FAQs
Can I make the crust from scratch?
Absolutely! While this Old-Fashioned Chocolate Cream Pie Recipe calls for a pre-baked crust for convenience, making your own flaky pie crust from scratch will bring an extra homemade touch and impressive flavor.
What’s the secret to a perfectly fluffy meringue topping?
The key is to make sure your bowl and beaters are completely clean and free from any fat, plus adding cream of tartar stabilizes the egg whites. Adding sugar slowly while beating helps create that glossy, stable meringue that holds its shape beautifully.
Can I substitute milk with a non-dairy alternative?
Yes, you can use almond milk or oat milk, but keep in mind the custard may have a slightly different flavor and texture. Whole milk gives the richest, creamiest result for the classic taste of this pie.
Why does the meringue sometimes shrink away from the pie edges?
Not sealing the meringue properly to the crust allows air to escape during baking, causing shrinkage. Press the meringue right up to the crust edges to create a good seal and prevent this issue.
Can I prepare this pie a day in advance?
Yes, you can prepare the pie a day ahead and refrigerate it. Just cover it loosely with plastic wrap to protect the meringue topping and let the flavors develop overnight. It actually tastes even better after resting!
Final Thoughts
This Old-Fashioned Chocolate Cream Pie Recipe is truly a treasure of classic desserts, offering that wonderful combination of creamy, chocolatey, and fluffy all in one bite. It’s a recipe to keep in your back pocket whenever you want to impress family and friends with something heartfelt and delicious. Give it a try—you might just create a new favorite every time dessert rolls around.
Print
Old-Fashioned Chocolate Cream Pie Recipe
- Prep Time: 15 minutes
- Cook Time: 20 minutes
- Total Time: 35 minutes
- Yield: 8 servings
- Category: Dessert
- Method: Baking
- Cuisine: American
Description
This Old-Fashioned Chocolate Cream Pie features a rich, velvety chocolate custard filling baked in a crisp pre-baked pie crust, topped with a light and fluffy meringue. Elegant and deeply chocolatey, it’s a classic dessert perfect for any occasion.
Ingredients
For the Pie Filling
- 1 pre-baked pie crust
- 1/4 cup butter
- 1 cup granulated sugar
- 1/4 cup all-purpose flour
- 1/2 cup cocoa powder
- 2 cups milk
- 3 egg yolks
- 1 teaspoon vanilla extract
For the Meringue Topping
- 3 egg whites
- 1/4 teaspoon cream of tartar
- 1/2 cup sugar
Instructions
- Prepare the Filling: In a medium saucepan, combine the sugar, flour, and cocoa powder. Gradually add milk while whisking until smooth. Cook over medium heat, stirring constantly, until the mixture thickens and comes to a boil.
- Temper the Egg Yolks: In a separate bowl, lightly beat the egg yolks. Slowly whisk about a cup of the hot chocolate mixture into the yolks to temper them. Then, return the yolk mixture to the saucepan and cook for 2 more minutes, stirring constantly.
- Add Butter and Vanilla: Remove the saucepan from heat and stir in the butter and vanilla extract until the butter is melted and the mixture is smooth.
- Fill the Pie Crust: Pour the chocolate filling into the pre-baked pie crust. Set aside while preparing the meringue.
- Make the Meringue: In a clean mixing bowl, beat egg whites and cream of tartar with an electric mixer until soft peaks form. Gradually add sugar, beating until stiff, glossy peaks form.
- Top the Pie: Spread the meringue over the hot chocolate filling, making sure to seal the edges to the crust to prevent shrinking.
- Bake the Pie: Bake the pie in a preheated oven at 350°F (175°C) for about 10-12 minutes, or until the meringue is golden brown.
- Cool and Serve: Allow the pie to cool completely, then refrigerate for at least 2 hours before serving to let the filling set properly.
Notes
- Make sure the pie crust is fully pre-baked to prevent sogginess.
- When tempering egg yolks, add hot mixture slowly to prevent curdling.
- Seal the meringue edges well to stop it from shrinking away from the crust.
- Use fresh eggs for the best meringue results.
- Allow pie to chill thoroughly for a firm set and easier slicing.
