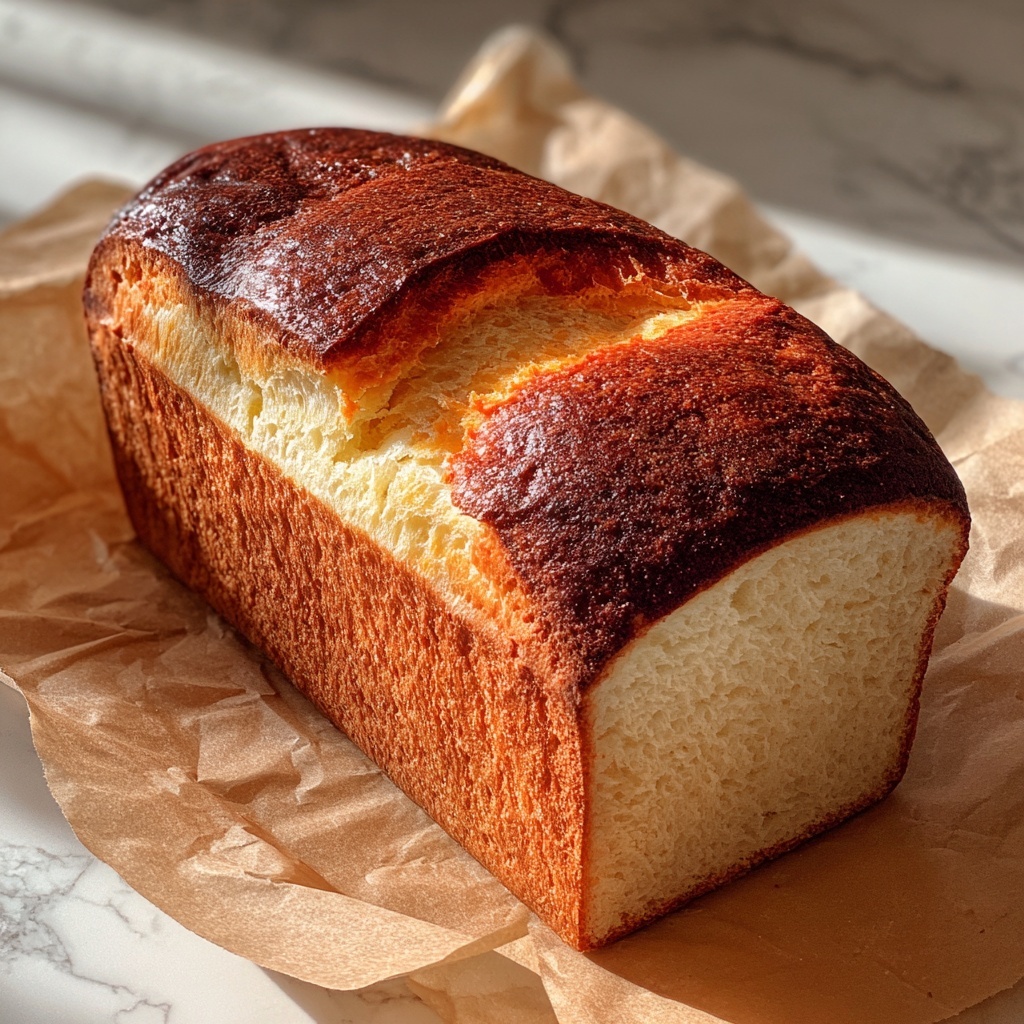
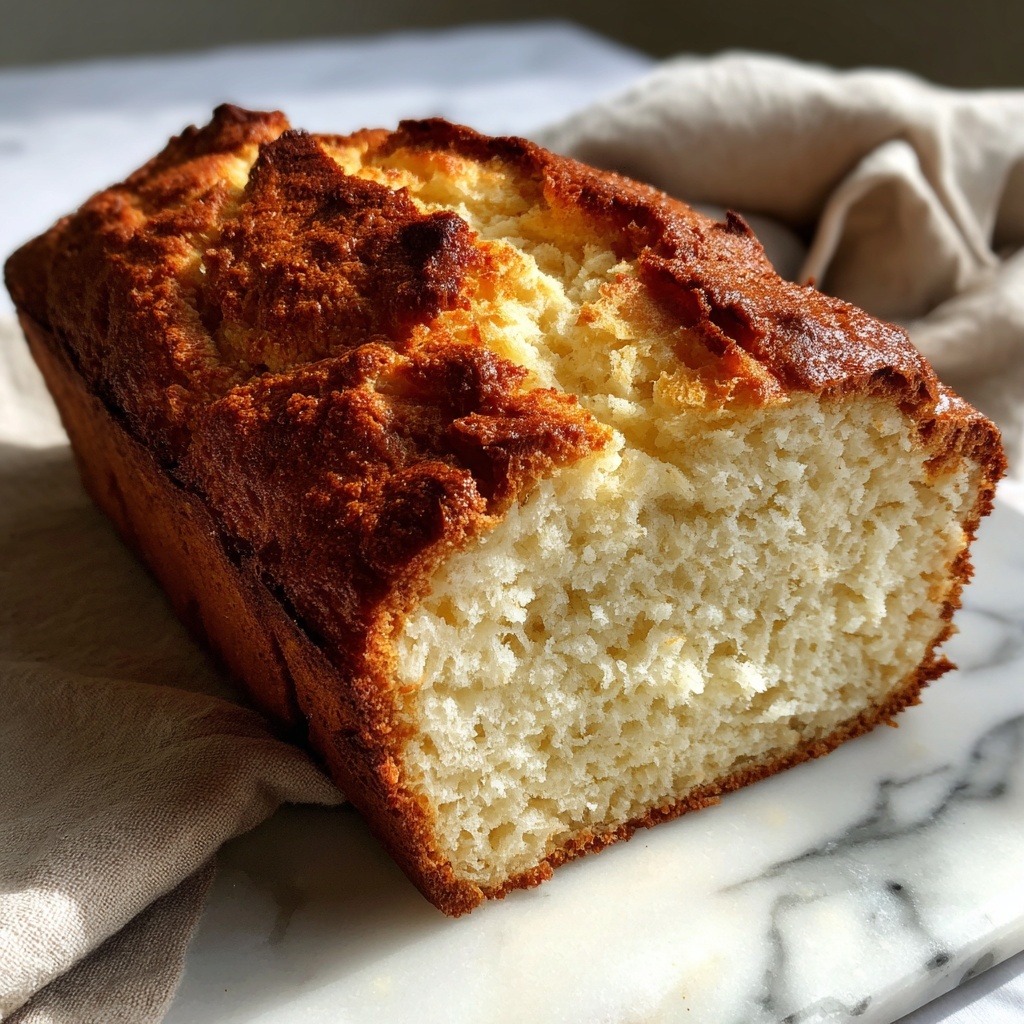
If you’ve ever missed the comforting goodness of a traditional sandwich bread but need to avoid gluten, you are going to love this Classic Gluten-Free White Sandwich Bread Recipe. It’s a wonderfully soft, fluffy, and flavorful loaf that churns out all the nostalgia and versatility of your favorite white bread without any gluten in sight. With simple, familiar ingredients and a straightforward method, this recipe is your new go-to for sandwiches, toast, or just enjoying with some butter fresh from the oven.
Ingredients You’ll Need
Every ingredient in this Classic Gluten-Free White Sandwich Bread Recipe plays a crucial role in achieving that perfect texture and flavor. From the gluten-free flour providing the base, to the eggs adding moisture and structure, each element is essential to give you a loaf that rises beautifully and tastes like home.
- Gluten-free all-purpose flour: The foundation for this bread, providing structure while being entirely gluten-free.
- Sugar: A touch of sweetness that also helps feed the yeast for a great rise.
- Salt: Balances the flavors and enhances the taste of the bread.
- Active dry yeast: The magic ingredient that makes your bread light and fluffy.
- Warm water: Activates the yeast and helps bring the dough together.
- Olive oil: Adds moisture and richness to the bread’s crumb and crust.
- Eggs: Bind ingredients and add a tender, soft texture to the bread.
How to Make Classic Gluten-Free White Sandwich Bread Recipe
Step 1: Preparing Your Oven and Pan
Start by preheating your oven to 375°F (190°C). While it warms up, grease a loaf pan generously. This step ensures your bread will release cleanly when baked and prevents any sticking. Having the pan ready in advance makes the whole process smoother.
Step 2: Mixing the Dry Ingredients
In a large mixing bowl, combine the gluten-free all-purpose flour, sugar, salt, and active dry yeast. This blend forms the dry foundation of your bread. Mixing these well allows the salt and yeast to distribute evenly, so your bread rises consistently and tastes balanced.
Step 3: Adding the Wet Ingredients
Pour the warm water, olive oil, and eggs into the bowl with the dry ingredients. Use a sturdy spoon or mixer to mix everything until a smooth dough forms. It won’t be like traditional wheat dough – expect a batter-like consistency that nonetheless bakes into a beautiful loaf.
Step 4: Transferring to the Pan and Smoothing
Carefully spoon the dough into your prepared loaf pan, smoothing the top with a spatula. This helps the loaf rise evenly and results in a neat, classic bread shape. Don’t worry if the dough feels softer than traditional dough; that’s perfectly normal here.
Step 5: Baking to Golden Perfection
Place your loaf in the oven and bake for about 40 minutes. You’re aiming for a golden brown crust that sounds hollow when you tap the bottom gently. This hollow sound is your clue that the bread is cooked through and ready to come out.
Step 6: Cooling Before Slicing
After baking, let your loaf cool in the pan for 10 minutes. This resting period helps the bread firm up just enough to transfer it safely to a wire rack. Cooling completely on the rack ensures your slices hold their shape and don’t turn gummy.
How to Serve Classic Gluten-Free White Sandwich Bread Recipe

Garnishes
This Classic Gluten-Free White Sandwich Bread Recipe shines on its own, but garnishing with a light spread of softened butter, or perhaps a sprinkle of coarse sea salt and a drizzle of olive oil, can elevate it wonderfully. Fresh herbs like rosemary or thyme add an aromatic touch if you’re feeling fancy.
Side Dishes
Pair this bread with your favorite soups and salads for a wholesome meal. It’s perfect for dipping into a creamy tomato soup or alongside a fresh garden salad dressed with vinaigrette. It also complements breakfast favorites like scrambled eggs and avocado beautifully.
Creative Ways to Present
Put a twist on your usual sandwiches by toasting slices and topping them with smashed avocado, cherry tomatoes, and a sprinkle of feta. Or go classic with peanut butter and jelly for a nostalgic treat. For a fun brunch, cut into cubes and serve with fondue or a charcuterie board.
Make Ahead and Storage
Storing Leftovers
The bread keeps well at room temperature for up to two days when stored in an airtight container or wrapped tightly in plastic wrap. This prevents it from drying out and maintains its soft texture perfectly for those sandwich cravings.
Freezing
To extend its life, slice the bread and store it in a freezer bag. Slice-by-slice freezing means you can toast exactly what you need without defrosting the whole loaf. The bread freezes beautifully and retains its fresh-baked taste when thawed carefully.
Reheating
Warm slices in a toaster or oven to reinvigorate the crust and bring back that freshly baked feeling. Avoid microwaving as it can make the bread chewy or rubbery. Toasting highlights the bread’s texture and flavor perfectly.
FAQs
Can I use a different flour blend for this Classic Gluten-Free White Sandwich Bread Recipe?
Yes, you can, but it’s best to use a gluten-free all-purpose blend that contains xanthan gum or a similar binder to mimic gluten’s elasticity. This will help your bread rise and hold together properly.
Is it necessary to use eggs in this recipe?
Eggs contribute moisture, structure, and richness to the bread, but if you need to avoid them, you can substitute with flax eggs or commercial egg replacers. Keep in mind texture will vary slightly.
Can I make this bread vegan?
Absolutely! Replace the eggs with plant-based alternatives like flax or chia seeds mixed with water, and swap olive oil for a vegan-friendly oil if needed. Adjust baking times slightly to check for doneness.
Why is my gluten-free bread dense?
Density often comes from insufficient rising time, old yeast, or too much flour. Make sure your yeast is fresh and water is warm enough to activate it properly, and don’t overpack the flour when measuring.
How long does this bread stay fresh?
Stored properly at room temperature, this bread lasts for about 2 to 3 days before it starts to dry out. Freezing is your best bet for keeping it fresh longer.
Final Thoughts
If you’ve been searching for a reliable, delicious loaf that fits your gluten-free lifestyle, this Classic Gluten-Free White Sandwich Bread Recipe is the answer. It’s simple, satisfying, and ready to become a staple in your kitchen. Trust me, once you have a warm slice fresh from the oven, you’ll never look back!
Print
Classic Gluten-Free White Sandwich Bread Recipe
- Prep Time: 10 minutes
- Cook Time: 40 minutes
- Total Time: 55 minutes
- Yield: 1 loaf (about 8 slices)
- Category: Bread
- Method: Baking
- Cuisine: American
- Diet: Gluten Free
Description
This Classic White Sandwich Bread recipe is a simple and delicious gluten-free loaf perfect for everyday sandwiches and toast. Made with gluten-free all-purpose flour, active dry yeast, and enriched with eggs and olive oil, this bread delivers a tender crumb and golden crust. An easy-to-follow recipe that yields a soft, flavorful loaf ideal for gluten-free bakers.
Ingredients
Dry Ingredients
- 2 cups gluten-free all-purpose flour
- 1 tablespoon sugar
- 1 teaspoon salt
- 1 tablespoon active dry yeast
Wet Ingredients
- 1 cup warm water
- 2 tablespoons olive oil
- 2 eggs
Instructions
- Preheat Oven and Prepare Pan: Preheat your oven to 375°F (190°C) and grease a loaf pan to prevent sticking and ensure easy removal of the bread after baking.
- Combine Dry Ingredients: In a mixing bowl, thoroughly mix the gluten-free all-purpose flour, sugar, salt, and active dry yeast to evenly distribute the leavening agent and seasonings.
- Add Wet Ingredients and Mix: Pour the warm water, olive oil, and eggs into the dry ingredients. Mix the mixture until a smooth dough forms, ensuring all ingredients are well incorporated.
- Transfer Dough to Pan: Spread the dough evenly into the prepared loaf pan and smooth the surface with a spatula for an even bake.
- Bake the Bread: Place the pan in the preheated oven and bake for about 40 minutes, or until the bread is golden brown and sounds hollow when tapped, indicating it is cooked through.
- Cool the Bread: Allow the bread to cool in the pan for 10 minutes to set, then transfer it to a wire rack to cool completely before slicing to maintain texture and prevent sogginess.
Notes
- Ensure the water is warm (not hot) to activate the yeast properly without killing it.
- Using gluten-free all-purpose flour blend suitable for baking yields the best results.
- The bread sounds hollow when tapped if baked through, which is a reliable doneness test.
- Letting the bread cool completely before slicing prevents crumbling and maintains its structure.
- This recipe can be doubled to make two loaves if desired.


