
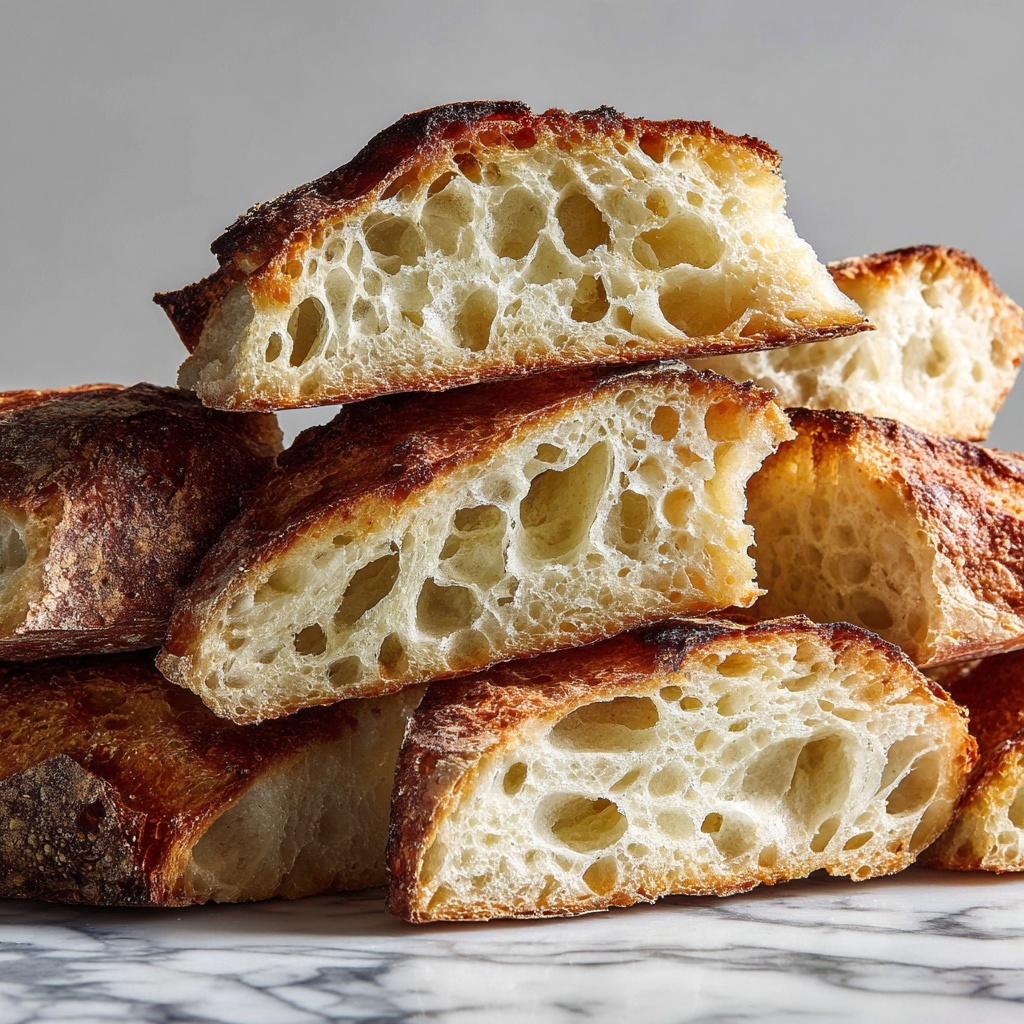
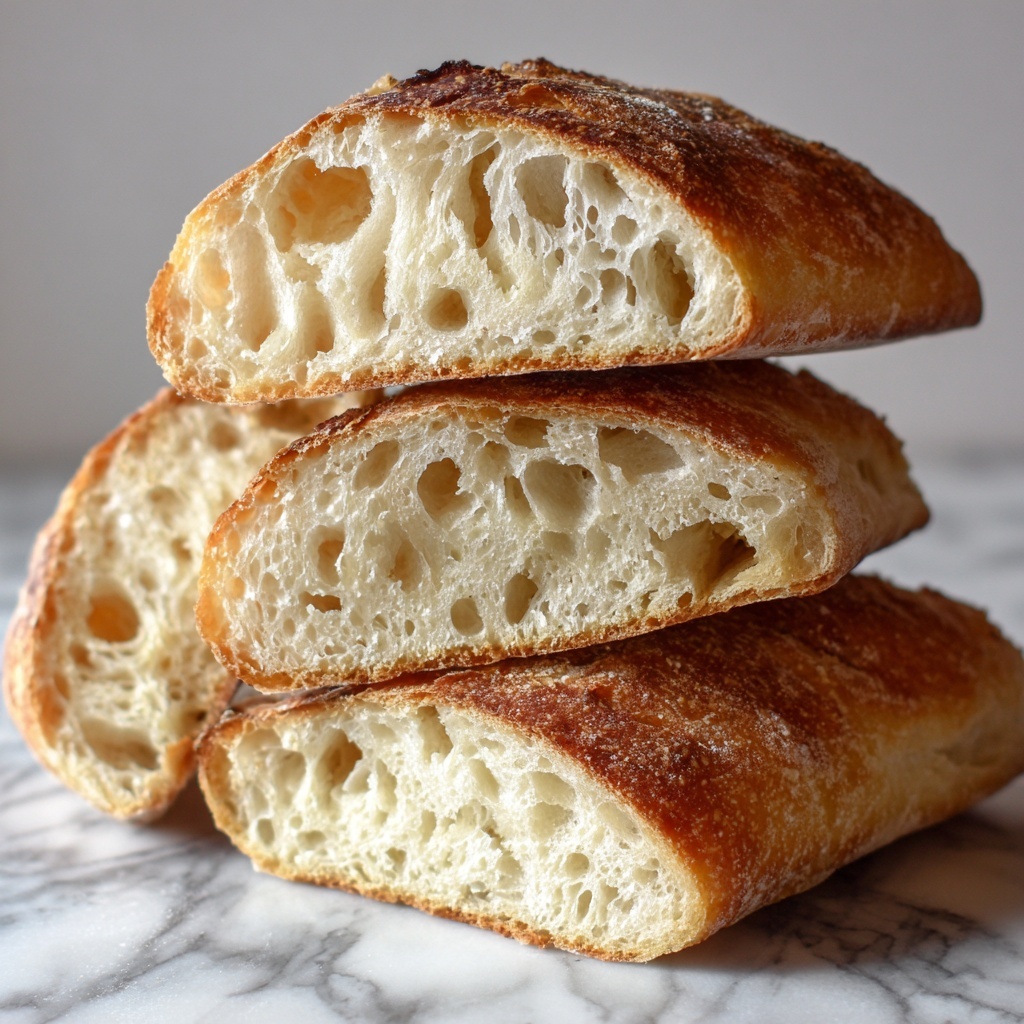
If you’ve ever dreamed of filling your home with the irresistible aroma of freshly baked bread and savoring slice after slice of perfectly tangy crust with a chewy, airy crumb, then this Homemade Sourdough Bread Recipe is your new best friend. It’s not just a loaf of bread; it’s a rewarding experience that takes simple ingredients and transforms them through time and love into something truly magical. Whether you’re a seasoned baker or just starting out, this recipe guides you to that picture-perfect boule that impresses every time.
Ingredients You’ll Need
Creating this Homemade Sourdough Bread Recipe relies on a handful of straightforward ingredients, but each plays a crucial role in delivering that classic sourdough flavor, chewy texture, and beautiful golden crust. Using quality ingredients and the right measurements ensures your bread turns out just right.
- Bread flour or all-purpose flour: Provides structure and chew, with bread flour giving a stronger gluten network for a better rise.
- Warm water: Helps to activate your sourdough starter and bring the dough together; the temperature should be comfortably warm to the touch.
- Active sourdough starter: The heart of your bread, packed with natural yeast and bacteria to give that distinctive tang and natural rise.
- Salt: Enhances flavor and helps control fermentation, giving your bread a balanced taste and firm structure.
How to Make Homemade Sourdough Bread Recipe
Step 1: Mix Flour and Warm Water
Start by combining 4 cups of flour with 1⅔ cups of warm water in a large mixing bowl. Stir them until you have a shaggy, uneven dough. This initial rest, known as autolyse, allows the flour to absorb water fully, helping gluten develop and improving the dough’s texture without any extra effort.
Step 2: Add Starter and Salt
Next, add 1 cup of your active sourdough starter along with 2 teaspoons of salt to the dough. Stir everything together thoroughly to ensure the starter and salt are evenly incorporated, which fuels fermentation and adds depth of flavor.
Step 3: Stretch and Fold
Cover your bowl and let the dough rise at room temperature. Every 30 minutes for the next 2 hours, perform gentle stretch and folds directly in the bowl. This technique strengthens the dough’s gluten network, giving your bread that perfect open crumb and elasticity.
Step 4: Bulk Fermentation
After the last fold, allow the dough to rise undisturbed for 6 to 8 hours or until it has doubled in size. This longer fermentation encourages a lovely tangy flavor and better texture — patience here is absolutely rewarded.
Step 5: Shape and Proof
Gently shape your dough into a round loaf, handling it with care to preserve the air bubbles you’ve developed. Place the loaf seam-side up into a generously floured proofing basket, then refrigerate it for 8 to 12 hours. This cold proofing step enhances flavor complexity and makes the dough easier to score before baking.
Step 6: Preheat and Prepare to Bake
About an hour before baking, preheat your Dutch oven in the oven at 450°F (232°C). This hot environment creates the steamy heat necessary to develop a crisp, golden crust while keeping the bread moist inside.
Step 7: Score and Bake
Carefully remove your dough from the fridge and score the surface with a sharp knife or lame. The cuts allow the bread to expand in the oven without cracking randomly, giving it an artisan look. Transfer the dough on parchment paper to your hot Dutch oven; cover and bake for 20 minutes.
Step 8: Finish Baking
After 20 minutes, remove the lid and continue baking the bread for another 25 minutes, until you see a beautiful golden brown crust. This final bake crisps and deepens the flavor while completing the crust development.
Step 9: Cool Completely
Once baked, resist the temptation to slice too soon! Let your bread cool entirely on a wire rack. Cooling lets the crumb set properly and makes slicing easier, ensuring every bite is lovely and satisfying.
How to Serve Homemade Sourdough Bread Recipe
Garnishes
A simple brush of melted butter or olive oil on just-out-of-the-oven sourdough makes every bite melt in your mouth. You can also sprinkle flaky sea salt over the crust or add fresh herbs like rosemary right after baking for extra aroma and taste.
Side Dishes
This bread pairs wonderfully with so many dishes. Think creamy soups, fresh salads, or smoky charcuterie boards. Because of its robust flavor and texture, it holds its own alongside bold cheeses, savory spreads, or even just a slather of your favorite jam.
Creative Ways to Present
Turn your loaf into a beautiful centerpiece by slicing it thick for hearty sandwiches, or hollow it out for a rustic bread bowl filled with chili or dip. Toasted sourdough cubes make perfect croutons, and even simple bruschetta takes your appetizer game to a whole new level.
Make Ahead and Storage
Storing Leftovers
Wrap leftover bread in a clean kitchen towel or paper bag to maintain the crust’s crispness while keeping the crumb soft. Avoid plastic bags as they trap moisture, causing the crust to become soggy. Stored this way, sourdough stays fresh for 2 to 3 days.
Freezing
If you bake in large batches, homemade sourdough freezes beautifully. Slice before freezing for convenience, then seal tightly in an airtight bag. When ready to enjoy, defrost at room temperature or thaw slices directly in the toaster for that fresh-baked taste.
Reheating
To bring leftover sourdough back to life, pop it in a preheated oven at 350°F (175°C) for 10 minutes. This refreshes the crust and warms the crumb without drying it out. For single slices, a toaster or toaster oven works just as well.
FAQs
Do I have to use bread flour?
Bread flour is preferred for its higher protein content, which gives sourdough bread its chewy texture and good rise. However, all-purpose flour works fine too, especially if you adjust fermentation times slightly.
How do I know if my sourdough starter is active?
An active starter will be bubbly and have a pleasant tangy smell. A simple float test can help: drop a spoonful of starter in water; if it floats, it’s ready to bake with.
Can I speed up the fermentation process?
Because sourdough relies on natural yeast, slowing and long fermentation are key to flavor and texture. Warmer environments can speed things slightly, but rushing this stage may impact taste and rise.
What if I don’t have a Dutch oven?
You can bake sourdough on a baking stone or sheet, and create steam by placing a pan of hot water in the oven or spraying water during the first minutes of baking to achieve a crisp crust.
How long will this bread stay fresh once baked?
When stored properly, sourdough bread stays fresh about 2 to 3 days. Because of its natural acidity, it resists mold longer than other breads but is best enjoyed fresh.
Final Thoughts
Baking your own Homemade Sourdough Bread Recipe is like crafting edible art that fills your home with warmth and your belly with satisfaction. The process might take a bit longer than regular bread, but the results are so worth the time and care. Give it a try, share it with loved ones, and watch how this humble loaf becomes a treasured staple in your kitchen. Happy baking!
Print
Homemade Sourdough Bread Recipe
- Prep Time: 1 hour 15 minutes (includes initial mixing, resting, and stretch and fold periods)
- Cook Time: 45 minutes
- Total Time: Approximately 14 to 16 hours (includes fermentation and refrigeration times)
- Yield: 12 servings
- Category: Bread
- Method: Baking
- Cuisine: European
Description
Classic homemade sourdough bread with a crisp crust and chewy interior, naturally fermented with an active sourdough starter. This recipe takes time and patience but rewards you with a flavorful artisanal loaf baked in a Dutch oven for perfect steam and crust.
Ingredients
Dough
- 4 cups (500g) bread flour or all-purpose flour
- 1⅔ cups (375g) warm water
- 1 cup (200g) active sourdough starter
- 2 teaspoons (10g) salt
Instructions
- Mix flour and water: In a large mixing bowl, combine the flour and warm water until a shaggy dough forms. Let it rest for 30 minutes to allow the flour to fully hydrate.
- Add starter and salt: Add the active sourdough starter and salt to the dough mixture, stirring well until fully combined and uniform in texture.
- First rise with stretch and folds: Cover the bowl and let the dough rise at room temperature while performing stretch and folds every 30 minutes for 2 hours to develop gluten structure.
- Bulk fermentation: After the last stretch and fold, let the dough rise undisturbed at room temperature for 6 to 8 hours until it doubles in size, indicating good fermentation.
- Shape and retard: Shape the dough into a round loaf and place it seam-side up in a floured proofing basket. Refrigerate the dough for 8 to 12 hours to retard fermentation and develop flavor.
- Preheat Dutch oven: Preheat your oven with a Dutch oven inside to 450°F (232°C) to create an ideal baking environment with steam.
- Score and transfer: Score the top of the loaf with a sharp knife to allow controlled expansion. Transfer the dough on parchment paper into the hot Dutch oven carefully.
- Bake covered: Bake the bread covered for 20 minutes to trap steam, which helps create a crisp crust.
- Bake uncovered and cool: Remove the lid and bake for an additional 25 minutes until the crust is golden brown. Allow the bread to cool completely on a wire rack before slicing to set the crumb.
Notes
- Ensure your sourdough starter is active and bubbly before using to achieve good rise.
- The long fermentation times develop flavor, so do not rush the process.
- Use a sharp blade for scoring to get clean cuts for better oven spring.
- Cooling the bread completely before slicing prevents a gummy texture inside the crumb.
- You can substitute bread flour with all-purpose flour but expect a slightly less chewy texture.


